
1959 Fender Precision
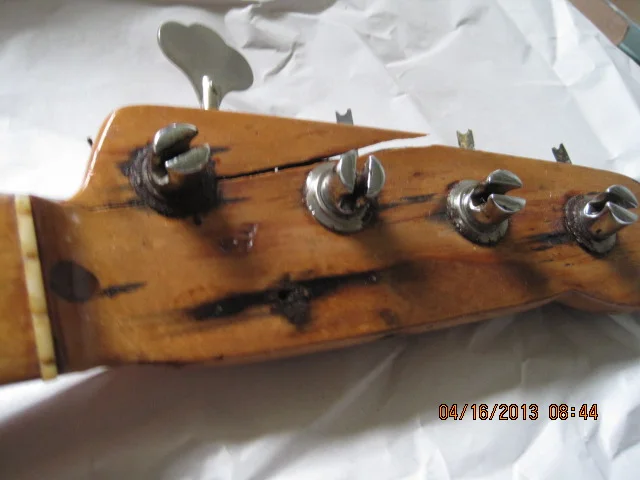
This 1959 Fender Precision Bass came in looking like it sat on the bottom of Lake Michigan for a while. Time for some major repair and restoration including a headstock rebuild. Click the photos below to read about each step pictured here!
01
Soggy Headstock
This P-bass suffered severe water damage and was really coming apart.
02
Headstock in pieces
The headstock was broken and deformed enough to require a complete rebuild.
03
New headstock - face
Here we've scarf-jointed a whole new headstock onto the neck.
04
New headstock - back
Here's a rear view of the new headstock.
05
New headstock - side
Here's a side view of the new headstock roughed-in.
06
Milling Headstock Splines
Here we're milling slots into the headstock and neck for the splines that will be used to reinforce the scarf joint.
07
Splines - back
Here's a view of the back of the headstock and neck after the splines were put in place.
08
Splines - front
Here you can see the newly-installed splines from the front of the headstock.
09
Spline shaping - front
Next we re-shape everything to make it look like a bass headstock again.
10
splines - shaping - rear
Here you can see the back of the neck and headstock after re-shaping everything.
11
splines - rear - 3/4 view shaped
Everything is shaped like a neck again.
12
splines - headstock face 3/4
The front of the headstock, ready for touchup to begin.
13
Headstock face - opaqued
After spraying color to conceal the splines, things are starting to look good again.
14
headstock face color
Splines? What splines?
15
headstock - color - rear
There's little obvious evidence left of the repair.
16
fretted and finished
Here we've got some frets again and the finish work is about done.
17
body hole-plugging
Filling some big voids in the body, and re-routing the wiring cavities.
18
complete bass front
Everything's put back together, ready to play some bass lines.
19
complete - front close
20
complete - rear view
21
complete - headstock rear
22
complete - headstock face
New decal, hardware cleaned up, it hardly looks used!
Next step
Yours could be next on the bench.
Drop off at Elston Avenue Monday through Saturday, noon to 6pm. No appointment needed. Or send photos for an estimate first.